To install an SSL certificate, you must obtain an SSL certificate from a Certificate Authority (CA) and a private key associated with the SSL certificate. Sometimes, you might need to provide intermediate certificates. Here’s how to install the SSL certificate in DirectAdmin
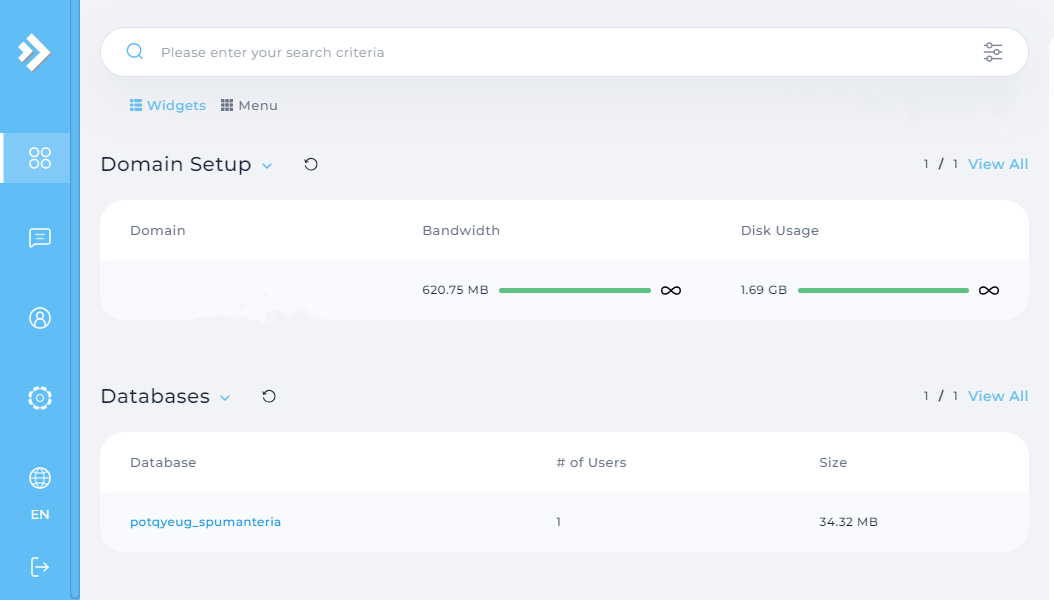
Step 1. Once you log in to your DirectAdmin panel, go to the “Account Manager” or “User Level” section by clicking the button at the top-left corner of the screen.
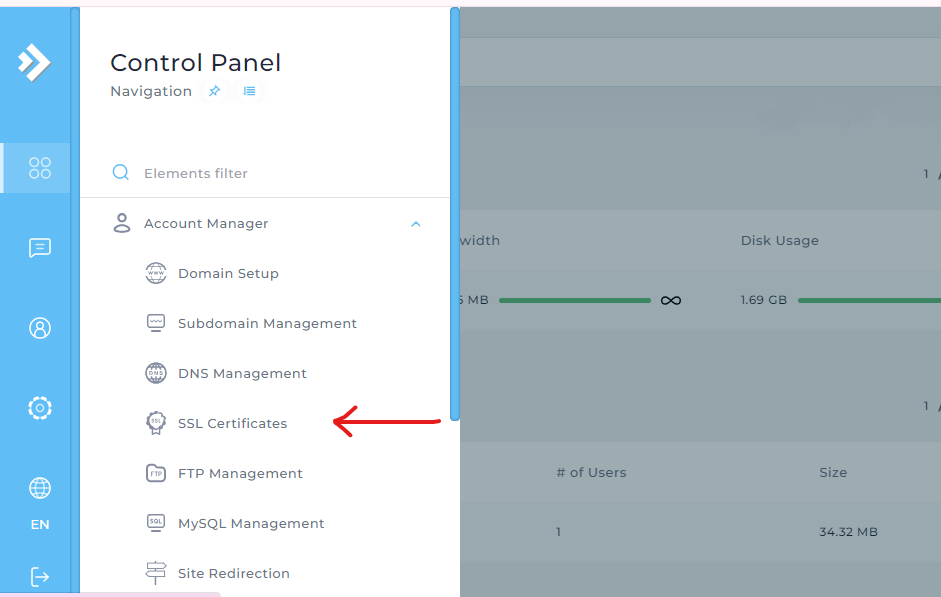
Step 2: Here, you can find the “SSL Certificates” option, click on that.
Step 3: look for the option “Paste a pre-generated certificate and key” and click.
Step 4: Now, paste your private key into the “KEY” field that you get from your SSL provider
Note: When generating a Certificate Signing Request (CSR) in DirectAdmin, the private key is simultaneously created. The private key is encapsulated with the following header and footer:
For Example, It starts & ends with
—–BEGIN PRIVATE KEY—–[Your Private Key]—–END PRIVATE KEY—–
Step 5: Again, paste your SSL certificate code into the certificate field. This certificate, you will get from the Certificate Authority.

The codes start and end the same as the previous one. You’ll find the same code in the your domain.crt file in your hosting account.
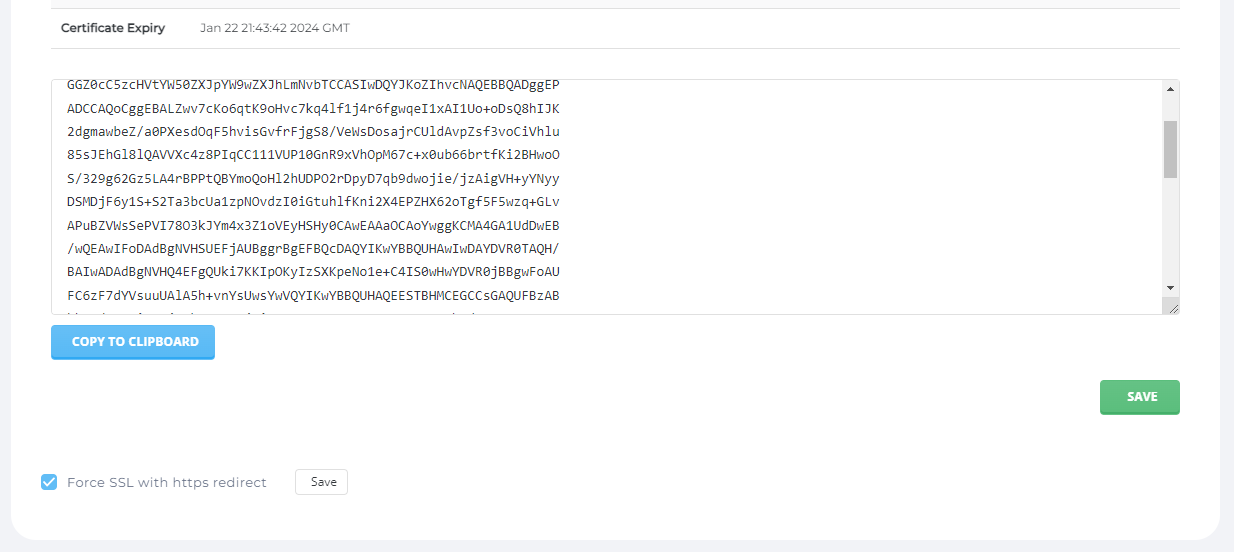
Step 6: Once you pasted both the codes, you can the option “Force SSL with https redirect” with a check box. Click on the box that enables HTTPS redirect for your website.
After completion, click the Save button
Step 7: For the last step, upload a CA-bundle file .ca-bundle to DirectAdmin. This file is provided by the certificate authority in the ZIP format via email. You can access or download these files from your hosting account.
Find a file called “yourdomain.ca-bundle”. Open this file on your computer. Copy the content from the file, and then paste it in the TXT format wherever it’s required in the DirectAdmin panel.
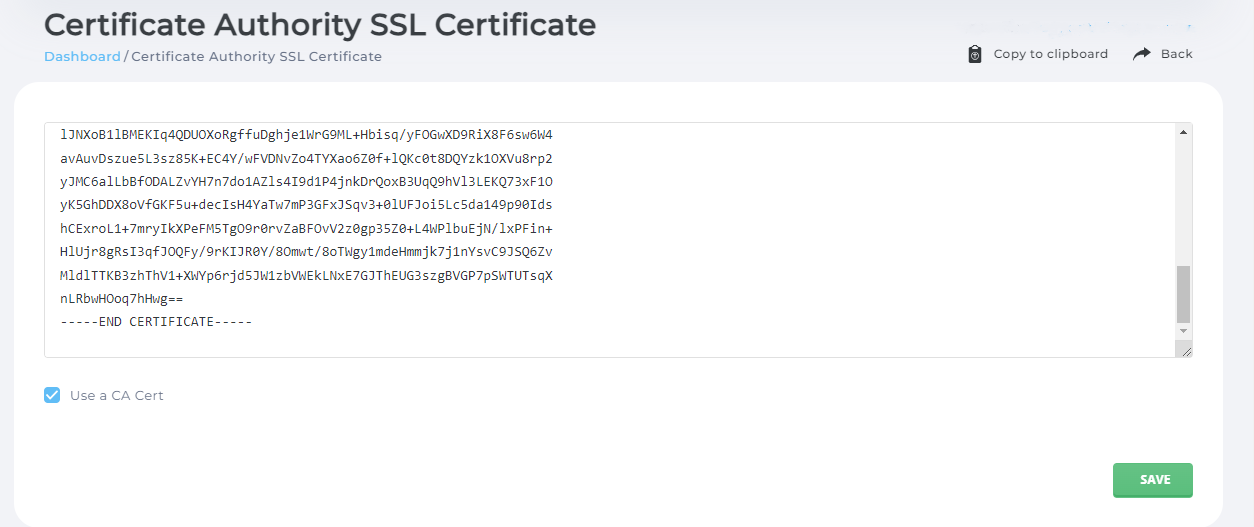
For that, click on the “Paste a pre-generated certificate and key” option and go SSL CA Certificate.

Now, paste your content into the CA bundle box. Tick the option “Use a CA cert” and save.
Final step: You will get a final success notification that is “Success CA certificate is ok”. This ensures your SSL certificate is installed properly on your website. For confirmation, you can visit your website.
What if, You get the “Could not Execute your request” Error
Let’s Troubleshoot it
Sometimes, you may see a “Could not Execute Your Request” or “SSL is not enabled for this domain” error when you try to open the SSL Certificates section in your Account Manager.
When you are seeing an error message like this, it probably means someone turned on the “Disable SSL” option in your DirectAdmin settings. This option stops you from installing SSL and even blocks you from opening the SSL Certificates section.
To fix this, you need to use SSH (a way to control your server through text commands) with root access. Once you’re in, run a command to open a file related to your domain.
sudo nano /usr/local/directadmin/data/users/USER/domains/DOMAIN.TLD.conf
Change a setting from ssl=OFF to ssl=ON, save the changes, and exit. This should solve the error.
If the problem is still available, get help from the Serverpoet expert via a direct chat or raise your ticket related to SSL certificate in DirectAdmin.
What More? ServerPoet offers Top-notch Managed Web Hosting services at an affordable cost that no one can deny. With cost, you can enjoy 99.9% uptime, faster server response time(<0.1sec), and 24/7 technical support.


Leave a Reply